
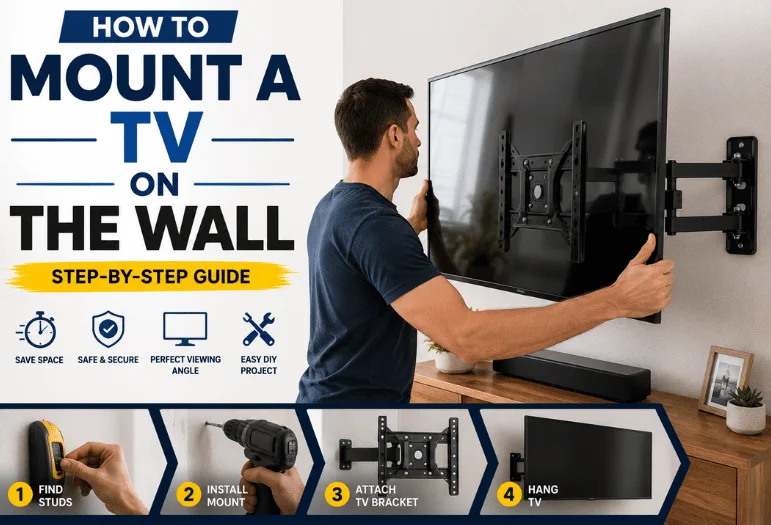
If you’re searching for how to mount a TV on the wall, the safe approach starts with compatibility and wall structure rather than the drill. Match the bracket to your television’s weight and mounting pattern. Then identify the wall type, choose the correct fixings, mark the position, drill pilot holes, secure the plate, and hang the screen with help. Samsung’s current mounting guidance follows the same basic sequence and stresses the importance of staying within the mount’s weight limits.
| How to mount a TV on the wall | What to check |
| Mount compatibility | TV weight, screen-size range, and VESA pattern |
| Wall | Wood studs, masonry, concrete, or another construction type |
| Position | Seated viewing height, glare, furniture, and port access |
| Tools | Drill, correct bit, level, tape measure, pencil, and stud finder |
| Fixings | Hardware approved for the wall and mounting system |
| Cables | Power, HDMI, Ethernet, and soundbar connections |
| Lifting | Have another person help with large or awkward screens. |
What You’ll Need Before Mounting the TV
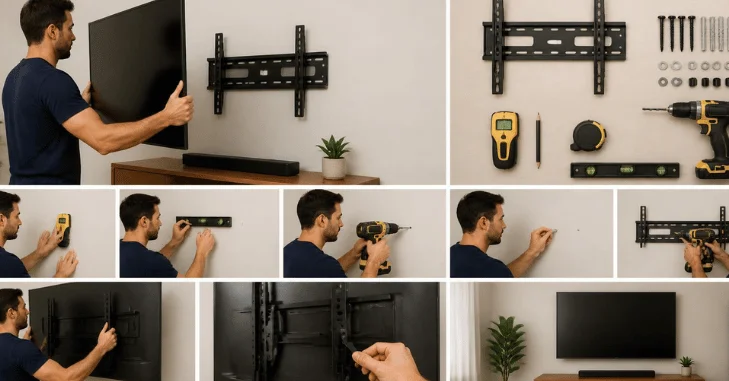
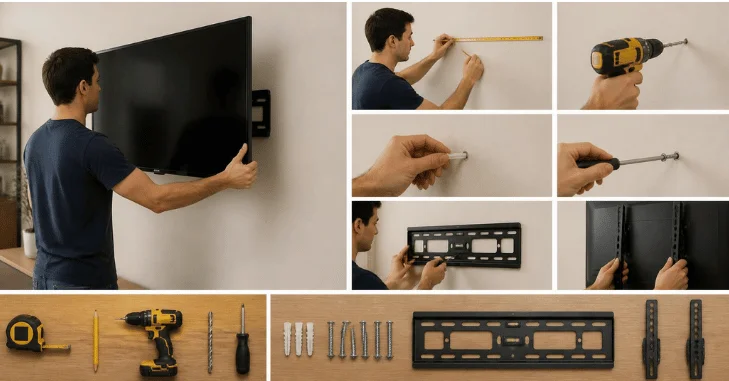
Gather the tools before taking the television off its stand. A typical installation requires a tape measure, pencil, level, drill, suitable drill bits, screwdriver or socket, stud finder, and the hardware supplied or specified by the mount manufacturer.
The bracket must also match the attachment points on the rear of the display. The VESA mounting system defines the spacing of these mounting holes, so check your television’s manual or specifications before buying or installing a bracket.
Don’t choose a bracket based on screen size alone. Confirm its stated weight capacity and mounting-hole compatibility as well. Samsung specifically advises staying within the recommended weight limits.
Pick the Right Mount and Viewing Position
Fixed mounts keep the television close to the wall. Tilting models let you angle the screen downward. Full-motion brackets can extend and swivel, which helps when seats aren’t directly in front of the display.
The right choice depends on the room, not on which mount has the longest feature list. A slim fixed bracket suits a straight-on viewing position. A tilting mount can help when the display must sit higher. Full-motion hardware makes sense when viewing angles change often.
For height, begin with the seated position you use most. Aim to keep the center of the screen near a comfortable seated eye level rather than following one fixed measurement for every room. Vogel’s also recommends eye level or slightly below as a starting point, with adjustments based on seating and room layout.
Before drilling, sit on the sofa and test the proposed position with painter’s tape or a cardboard outline. Check reflections, cabinet clearance, nearby outlets, and access to HDMI ports.
How to Mount a TV on the Wall in 8 Steps

Attach the mounting arms to the television.
Place the screen face-down on a clean, padded surface if the manufacturer permits it. Line up the bracket arms with the mounting holes. Use the correct screws and spacers, and don’t force screws that feel wrong. Samsung warns against overtightening mounting screws.
Identify the wall construction.
Determine whether you’re dealing with wood studs, masonry, concrete, plasterboard, or another wall system. The wall type determines the correct drill bit and fixing method. Vogel’s current installation guidance treats wall identification as a critical step because different materials require different hardware.
Locate structural support and check the drilling area.
On a conventional stud wall, locate the studs and mark their centers. Don’t assume a hollow-wall anchor is suitable simply because it fits through the hole. Use only a no-stud mounting system or fixing method specifically rated for your wall, mount, and load. Samsung provides separate procedures for stud and approved toggle-bolt installations.
Mark the bracket position.
Hold the wall plate or its paper template against the marked location. Use a level to align it before marking each hole. Measure the distance between the bracket hooks and the screen edges so the finished television sits at the height you planned.
Drill the correct pilot holes.
Follow the mounting-hardware instructions for the correct bit size and drilling depth. Samsung advises drilling pilot holes for stud installations before fastening the wall plate. If you’re uncertain about concealed electrical wiring, plumbing, or the wall structure, stop and use a qualified installer rather than drilling blindly.
Secure and level the wall plate.
Fasten the bracket using the specified hardware for the wall construction. Tighten it evenly, then check the level again before hanging anything. Don’t substitute random screws or anchors simply because they fit the bracket holes.
Connect hard-to-reach cables.
Plug in HDMI, Ethernet, or other cables that will become difficult to reach once the screen sits against the wall. Leave enough slack for a tilting or full-motion arm to move without pulling on a connector.
Lift, hang, and lock the television.
Use a second person for any set that is large, heavy, or awkward. Hang the attached arms onto the wall plate and engage every safety screw, latch, or locking mechanism required by the mount. Samsung’s instructions end with attaching the TV bracket to the mounted wall plate.
Once the television is installed, gently check that the screen is seated correctly before letting go of it. Never test the bracket by aggressively pulling on the television.
Don’t Ignore Cable and Power Safety
A clean installation can still be unsafe if the wiring is handled poorly. Surface raceways are a simple option for HDMI and other low-voltage cables. Purpose-built in-wall connection systems are another option when they are installed correctly.
Don’t run an ordinary extension cord through a wall cavity to hide it. The Electrical Safety Foundation International advises that extension cords shouldn’t pass through walls, ceilings, or floors or replace permanent wiring. Purpose-built recessed TV power systems are available for concealed installations.
If your setup includes several devices, Techixia’s Best Budget Earbuds in 2026 covers power management for televisions, consoles, and streaming equipment.
Finish the Rest of Your TV Setup
A wall-mounted screen still needs a dependable connection if most of your viewing comes from streaming services. Test the Wi-Fi connection at the television’s final position before hiding every cable. If reception is weak, start with Techixia’s guide to improving Wi-Fi signal before buying more networking hardware. It covers placement and interference checks that can solve coverage problems without requiring an immediate upgrade. Larger homes with persistent dead zones may benefit from Techixia’s mesh-router comparison, which looks at current systems for broader household coverage.
Common TV Wall-Mounting Mistakes
Measure the screen position rather than assuming the wall plate itself represents the television’s center. The VESA holes and mounting arms may sit higher or lower on the rear panel.
Don’t drill until you’ve confirmed that the bracket is level and the mounting points are correct. Taking extra measurements requires only a few minutes. Repairing misplaced holes takes longer.
Avoid guessing about wall anchors. The mount’s instructions and the wall construction determine the correct hardware. If you cannot identify the structure with confidence, professional installation is the safer next step.
Conclusion
Mounting a TV on the wall is straightforward when you treat compatibility and wall structure as priorities. Confirm the TV’s weight and VESA pattern, choose a mount rated for the exact screen, identify suitable structural support, and use the correct fixings for your wall type.
Take time to position the screen at a comfortable viewing height, plan cable routing before hanging it, and use a second person when lifting a large or awkward display. A secure installation should leave the TV level, firmly locked to the bracket, free of pinched cables, and ready for safe everyday use.
Apart from that, if you want to read more articles like Best Mouse for Work: 9 Smart Picks for Comfort, Speed, and All-Day Productivity, then visit Techixia’s “technology” category.
Check the Installation Before You Sit Down
Before switching everything on, confirm that every mount lock is engaged, the bracket remains level, the cables have enough slack, and nothing is being pinched behind the screen. A successful installation isn’t the one with the fewest visible wires. It’s the one that properly matches the television, bracket, and wall structure while giving you a comfortable viewing position.
Frequently Asked Questions
If you’re researching how to mount a TV on a wall without studs, some televisions can be installed using mounting systems specifically designed and rated for suitable hollow walls. That doesn’t mean every drywall anchor is safe. Follow the mount manufacturer’s instructions for the wall type and load. Samsung, for example, provides a separate toggle-bolt method for appropriate installations.
Start with the center of the display near seated eye level or slightly below it. Then adjust the position based on the room, seating height, screen size, furniture, and viewing angle.
A stud finder is useful for conventional framed walls because it helps identify structural framing behind the surface. Samsung’s stud-wall procedure specifically includes locating and marking studs before drilling.
Yes, provided the wall can support the load and you use fixings designed for that type of construction. Masonry installations require a different drilling and fastening approach from stud-wall installations. Follow the bracket manufacturer’s wall-specific instructions.
Don’t place an ordinary extension cord inside the wall. ESFI advises against routing extension cords through walls or using them as permanent wiring. Use a properly designed in-wall power solution or qualified electrical help where required.