
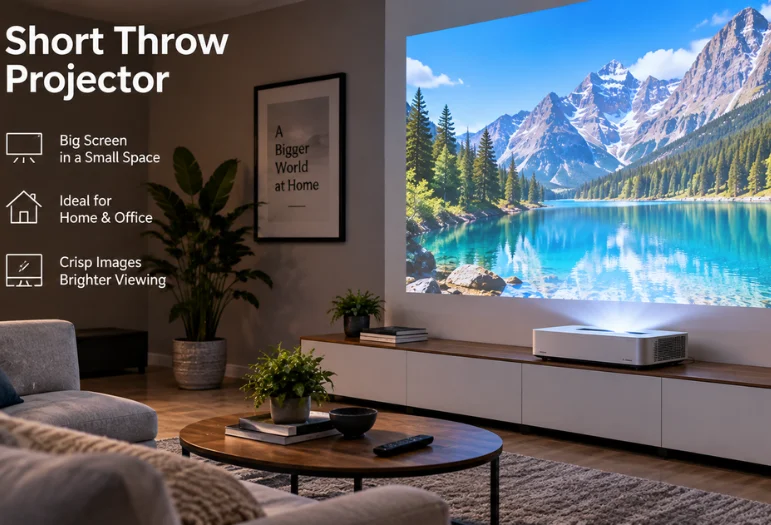
A short throw projector can turn a bedroom, apartment, gaming room, or living room into a large-screen viewing space without requiring a projector at the opposite end of the room. Its lens design creates a wide image from a relatively short distance.
That sounds simple, but choosing the right one depends on throw ratio, room lighting, resolution, screen size, gaming performance, and the exact space available between the projector and wall.
Direct answer: A short-throw projector produces a large image while sitting only a few feet from the screen. Short-throw models commonly use a throw ratio around 0.4:1 to 1.0:1, while ultra-short-throw models generally fall below 0.4:1. They are especially useful in smaller rooms where a conventional projector cannot sit far enough back.
| Short Throw Projector | Practical starting point |
|---|---|
| Throw ratio | Roughly 0.4:1–1.0:1 for short throws |
| Typical placement | A few feet from the screen |
| Best spaces | Apartments, bedrooms, gaming rooms, smaller home theaters |
| Screen size | Often 80–120 inches, depending on the model and room |
| Resolution | 1080p for value; 4K for larger screens and premium setups |
| Room lighting | Darker is easier; brighter rooms need more light output and better screen control. |
| Gaming | Check input lag, refresh rate, HDMI features, and supported resolution. |
| Screen | Flat white screen for controlled light; specialized options can help in brighter rooms. |
What Is a Short Throw Projector?
A short-throw model is designed to produce a large picture without the long lens-to-screen distance associated with a conventional projector. AVIXA describes short-throw ratios as typically ranging from about 0.4:1 to 1.0:1, while ratios below 0.4:1 are generally considered ultra-short throws. Epson describes short-throw installations more practically as projectors placed relatively close to the image surface, commonly around three to eight feet away.
The shorter distance changes where you can use projection technology. Instead of mounting hardware toward the back of a room, you may be able to place the projector on a coffee table, low stand, ceiling mount, or shelf much nearer the screen. That also reduces the chance that people walking through the room will constantly block the picture or cast large shadows.
How Throw Ratio Determines Projector Placement
Throw ratio is the specification you should understand before looking at brightness, speakers, smart apps, or even resolution. It compares the distance between the projector and screen with the width of the projected image, and ProjectorCentral expresses the formula as throw distance divided by image width. Once you know the throw ratio and desired screen width, you can estimate where the projector needs to sit.
The basic calculation is
Throw distance = image width × throw ratio
A 100-inch 16:9 image is approximately 87 inches wide. With a 0.5:1 throw ratio, the lens would need to sit about 43.5 inches, or roughly 3.6 feet, from the screen. A projector with a 0.8:1 ratio would need closer to 70 inches, or about 5.8 feet, for approximately the same image width.
| Projector type | Approximate throw ratio | Placement style |
|---|---|---|
| Ultra-short throw | Below 0.4:1 | Very close to the wall or screen |
| Short throw | About 0.4:1–1.0:1 | A few feet from the screen |
| Standard/long throw | Commonly 1.5:1 or higher | Farther into the room |
These categories help with planning, but the exact model specification always takes priority over a category label. Two projectors advertised as short throw can require noticeably different installation distances for the same screen size. Use the manufacturer’s projection chart or a model-specific calculator before drilling mounting holes or ordering furniture.
Short Throw vs. Ultra-Short Throw vs. Standard Projectors
This type of projector sits in the middle of the projection spectrum. It saves much more space than a conventional long-throw model while generally allowing more placement flexibility than an ultra-short-throw projector, which needs extremely precise positioning near the screen. The better option depends more on your room than on which category sounds more advanced.
| Feature | Short throw | Ultra-short throw | Standard throw |
|---|---|---|---|
| Distance from screen | A few feet | Inches to a few feet | Usually much farther away |
| Small-room suitability | Excellent | Excellent | Limited |
| Installation sensitivity | Moderate | High | Moderate |
| Shadow reduction | Good | Excellent | Lowest |
| Furniture requirements | Flexible | Usually needs a suitable front cabinet | Often ceiling or rear-room mounting |
| Screen sensitivity | Moderate | High | Lower |
| Typical use | Gaming, bedrooms, multipurpose rooms | TV replacement, premium living rooms | Dedicated theaters, larger rooms |
Ultra-short-throw models can create an especially clean TV-like setup because the hardware can sit directly below the screen. The trade-off is that the steep projection angle makes surface imperfections more visible, and ProjectorCentral notes that a properly flat screen becomes particularly important with UST systems.
A normal short throw can therefore be easier to live with when you want a large picture but do not need the projector pushed directly against the wall. A conventional projector still makes sense when the room already supports a ceiling installation, and you want maximum flexibility in lens choice or placement.
If you are deciding whether projection is worth the extra setup, compare the experience with Techixia’s 55-inch smart TV buying guide. A television remains simpler in bright rooms, while projection becomes more attractive when your main goal is an image dramatically larger than a normal TV.
Why Choose Short Throw?
The clearest advantage is space efficiency. You can create a cinema-sized image in a room that might not provide enough distance for a conventional projector, which makes the format particularly attractive for apartments and smaller U.S. homes. Keeping the projector near the front of the room also makes video cables and power connections easier to manage.
Short placement reduces interruptions as well. Epson specifically identifies reduced shadows and eye glare as benefits of short-throw projection compared with placing the projector farther back in a room. That can matter during gaming sessions, presentations, family movie nights, or any environment where people regularly move between the seating area and screen.
However, there are disadvantages, and they should influence your purchase. Specialized optics can increase cost, installation still requires careful measurement, and geometric errors become more obvious as the projector moves closer to the screen. A large projected image also cannot reproduce deep blacks in a bright room as easily as a good television because ambient light raises the visible black level of the projection surface.
Where Does Short Throw Make the Most Sense?
Small Living Rooms and Apartments
Compact living rooms are one of the strongest use cases because there may be no practical way to position a conventional projector ten or more feet away. A short throw model lets you keep most of the equipment near the display wall while leaving the seating area relatively clear. Renters can also avoid some complicated long cable runs, although any ceiling or wall mounting should still follow the property’s rules.
Gaming Rooms
Gaming is another strong match because players frequently stand, move, or use motion-based accessories in front of the seating position. Moving the projector toward the screen reduces the likelihood that someone will step through the light path and cast a shadow over half the game. The projector still needs genuinely low input lag, appropriate refresh-rate support, and the right HDMI capabilities for your console or gaming PC.
Home Theaters
A short throw setup can work well when you want theater-scale video but cannot redesign the entire room around a rear-mounted projector. The display is only half of a cinema setup, however, so plan the sound system at the same time rather than treating audio as an afterthought. Techixia’s multi-channel home theater guide explains when 5.1, 7.1, and Dolby Atmos layouts make sense.
Bedrooms and Multipurpose Rooms
Bedrooms, dens, and combined office-entertainment spaces often have furniture where a standard projector would ideally sit. Short throws give you more freedom to work around beds, desks, shelves, and walking paths. It also makes temporary setups more realistic when you do not want the projector permanently installed.
7 Things to Check Before You Buy
1. Measure the Room Before Choosing a Model
Start with the wall or screen width and measure the usable distance in front of it. Then work backward from the manufacturer’s throw ratio to determine whether the projector can actually create your target image size from that location. Buying first and measuring later is one of the easiest ways to end up with a 100-inch projector setup that only fits at 75 inches.
2. Choose Brightness for Your Actual Lighting
Projectors always benefit from controlling ambient light because unwanted room light makes dark parts of an image look grayer. ProjectorCentral explains that a traditional matte white screen suits darker viewing environments, while ambient-light-rejecting screen designs can help when you can’t fully control room lighting. Window coverings may therefore improve the experience more than paying for a feature you will rarely use.
Don’t shop based on the largest brightness number on a product page alone. Think about whether you mainly watch movies at night, sports during the afternoon, or mixed content throughout the day. A projector that looks impressive in a dark demo room may deliver a noticeably flatter image when sunlight reaches the screen.
3. Decide Whether You Need 1080p or 4K
A good 1080p model can still make sense for casual streaming, classroom use, or budget gaming. At larger image sizes, however, the additional detail of a good 4K model becomes easier to appreciate, especially when you sit relatively close to a 100-inch or larger image. Buyers should check how the manufacturer implements 4K rather than assuming every projector marketed with the term uses identical imaging technology.
Resolution also should not distract you from contrast, color, brightness, and optics. A mediocre 4K projector can look less satisfying than a well-tuned lower-resolution model in the same room. Match the whole imaging system to how you watch rather than treating pixel count as the only quality measurement.
4. Gamers Should Check Input Lag and Refresh Rate
Gaming performance depends on more than resolution. Look for tested input-lag figures at the exact combinations you expect to use, such as 1080p at high refresh rates or 4K at 60 or 120 Hz. Also confirm whether features such as variable refresh rate and automatic low-latency mode are actually supported rather than assuming they come with every modern HDMI port.
The distinction matters because a projector can be excellent for movies and still feel sluggish in competitive games. Casual adventure and strategy titles tolerate more delay than shooters, rhythm games, and other timing-sensitive genres. Console owners should verify compatibility with their specific PlayStation, Xbox, or gaming PC output before buying.
5. Compare Lamp, LED, and Laser Light Sources
Traditional lamp projectors remain available, but LED and laser light sources have become increasingly common. Solid-state designs generally appeal to buyers who want a long operating life, faster startup, and less concern about replacing a conventional projection lamp. The better choice still depends on the projector’s picture quality and price, not the light-source label alone.
Laser does not automatically mean brighter, more accurate, or better. Manufacturers can build excellent and mediocre projectors around the same broad light-source technology. Treat the light engine as one part of the decision and rely on full reviews and measurements when comparing finalists.
6. Check Connectivity Before the Projector Arrives
Count every source you intend to connect, including consoles, streaming boxes, PCs, sound systems, and possibly an antenna or media player. Make sure enough ports support the required HDMI features, and determine how audio will leave the projector if you use an AV receiver or soundbar. Wireless casting and built-in streaming apps are convenient, but they should supplement reliable wired connections, not compensate for missing ports.
Plan power at the same time because a media setup can quickly grow into several plugs. A projector, console, streaming device, speakers, and networking equipment may all share the same area. Techixia’s smart power strip guide covers outlet control, energy reporting, and surge-protection details worth considering around entertainment electronics.
7. Budget for the Screen, Not Just the Projector
A smooth wall can work, particularly in a dark room, but it is not automatically equivalent to a proper screen. Small waves, texture, paint variation, and surface defects become visible when you project a large image across them, and ultra-short-throw optics are particularly unforgiving. ProjectorCentral recommends a flat screen when surface imperfections interfere with the image and notes that specialized ambient-light-rejecting options can improve certain brighter-room installations.
Be careful when shopping for ALR screens because not every material works with every projector geometry. Screens designed for ultra-short-throw systems manipulate light differently from many conventional ALR materials because the projected light reaches them from a steep angle. Match the screen specification to short-throw or UST use instead of choosing it solely because the listing says “ambient light rejecting.”
How to Set Up the Projector Correctly
Begin with physical positioning rather than keystone correction. Place the projector near the screen’s centerline, use the manufacturer’s distance chart to set the target image size, and adjust the projector until the image is as square as possible. Digital correction helps with fine-tuning, but good physical alignment gives the projector a better starting point.
Use this order during installation:
- Choose the final screen size and position.
- Measure the screen’s actual width.
- Check the projector’s specified throw ratio.
- Calculate the approximate lens-to-screen distance.
- Position the projector on a stable surface or appropriate mount.
- Physically align and level the unit.
- Adjust focus and optical controls if available.
- Use digital geometry correction only for remaining small errors.
- Connect the source devices and verify their resolution and refresh rate.
- Test the picture using both daytime and nighttime room lighting.
After aligning the picture, calibrate the room under normal viewing conditions rather than in an artificial test environment. Check whether ceiling lights strike the screen, whether sunlight enters from either side, and whether viewers create shadows when standing. A ten-minute lighting test can reveal installation problems that specifications alone will never show.
Common Setup and Buying Mistakes
The most expensive mistake is assuming “short throw” tells you the required distance. Throw ratios vary, so the same furniture arrangement can work perfectly with one model and fail with another. Always calculate the actual image width and distance before ordering.
Another common mistake is buying a projector for daytime viewing while ignoring the screen and room lighting. More projector output helps, but ambient light still reduces perceived contrast when it reaches the image surface. Controlling windows and overhead lighting can make a dramatic difference without changing the projector.
Finally, avoid relying heavily on digital keystone correction to rescue poor placement. The closer projection geometry makes alignment more important, and an uneven wall can introduce distortions that software doesn’t truly solve. Start with the room, screen, furniture, and projector position, then use electronic correction as the final adjustment.
Is a Short Throw Worth It?
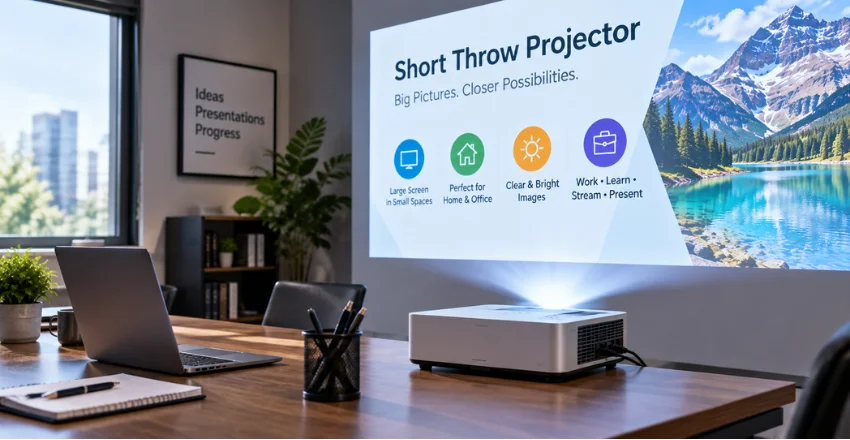
This kind of projector is worth considering when you want a much larger image than a conventional TV can provide but do not have space for a projector several feet behind the seating area. It is particularly attractive for gaming rooms, apartments, compact theaters, classrooms, and multipurpose spaces.
The format makes less sense when you mainly watch during bright daylight and would be equally satisfied with a conventional television-sized screen. Think of short throw as a room-layout solution rather than an automatic picture-quality upgrade. It changes where the projector can sit, but image quality still depends on the specific model, screen, lighting, source quality, and setup.
If those pieces work together, a relatively small room can support an image that feels far larger and more cinematic than its physical dimensions suggest.
The Bottom Line
A short throw setup is one of the most practical ways to build a big-screen setup when room depth is limited. Start with throw ratio and physical measurements, then choose brightness, resolution, gaming features, connectivity, and a screen that fits the space where you will actually watch. Get those fundamentals right, and you can create a convincing 80-, 100-, or even larger-inch viewing experience without designing the entire room around a distant projector.
Frequently Asked Questions
How far should a short-throw projector be from the screen?
No single distance applies to every model because placement depends on throw ratio and image width. Epson broadly describes short-throw projection as operating relatively close to the screen, commonly around three to eight feet, while individual models may differ. Always use the manufacturer’s projection table or calculate distance from the stated throw ratio before installation.
Can these projectors produce a 100-inch image?
Yes, many short-throw models are designed to produce images around 100 inches or larger when placed at the appropriate distance. For example, a projector with a 0.5:1 throw ratio would need roughly 3.6 feet of lens-to-screen distance to create an approximately 100-inch 16:9 image. You should still check the exact distance against the specifications of the model you choose.
Is a short throw better than an ultra-short throw?
Neither format is automatically better because they solve slightly different installation problems. Ultra-short throw works well when you want the projector extremely close to the screen, while normal short throw can offer easier positioning and fewer demands on the projection surface. Choose based on available furniture depth, screen type, room lighting, image size, and the installation precision you are comfortable with.
Do I need a special screen?
Not always, particularly when the room is dark and you have a smooth, flat conventional projection screen. Specialized ambient-light-rejecting materials can help in brighter spaces, while UST systems often benefit more strongly from screens designed specifically for their steep projection angle. Check screen compatibility carefully because material designed for one projection geometry may not perform properly with another.
Can I use one for gaming?
Yes, and short placement can be especially convenient because players are less likely to block the picture while moving around the room. The projector itself should still have sufficiently low input lag, the refresh rates you need, and appropriate HDMI support at your chosen resolution. Check independent measurements for the exact gaming mode rather than judging performance from the word “gaming” in a product name.
Can it replace a TV?
It can when screen size matters more to you than maximum daytime contrast and absolute simplicity. A projector can create a dramatically larger picture, but a television is generally easier to use in bright rooms and does not require the same attention to screen surfaces and alignment. Your viewing habits, room lighting, available wall space, and desired picture size should guide your choice.